Introduction
There has always been a fascination with US Navy aircraft and
model builders. The appeal of a war torn, hard hitting pacific
fighters and there perilous battles in the remote sun baked islands
of the Pacific Ocean, have spawned countless scale replica and
diorama recreations.
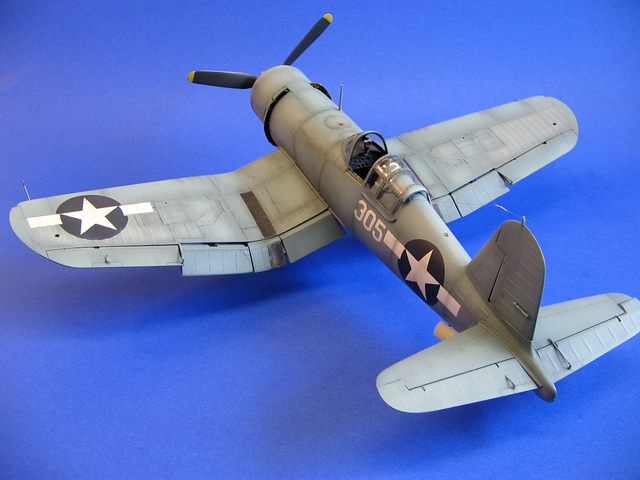
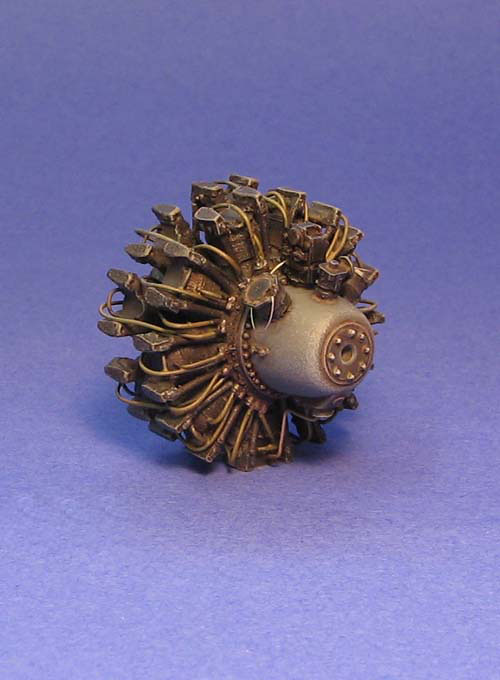
The F4U for me has always held a special attraction having
modeled countless kits in many scales and until the release of the
Tamiya 1/48th scale Corsair Birdcage, modelers had only the choice
of the 1A or 1D or the -4 versions in 1/32nd scale. Recently while
browsing the multitude of after market resin kits I happened upon a
gold mine for the 1/32nd scale F4U, a conversion kit from Mike West
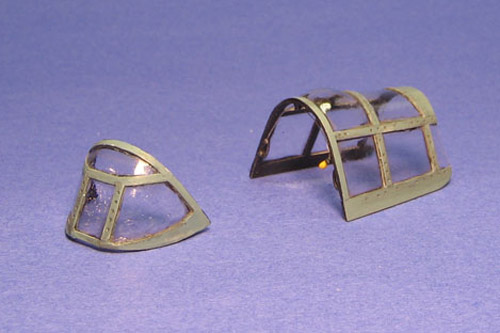
of Lone Star Models. A basic kit, that includes a cast resin aft
deck and two styles of the framed canopy fashioned in vacuform.
Construction
Finally I had the opportunity to build an F4U-1 Birdcage in 32nd
scale I decided to use the Trumpeter F4U- 1D as the basis for the
design, the Trumpeter kit while being one of the newest kits on the
market lacks detail throughout the kit but panel line detail is
abundant.
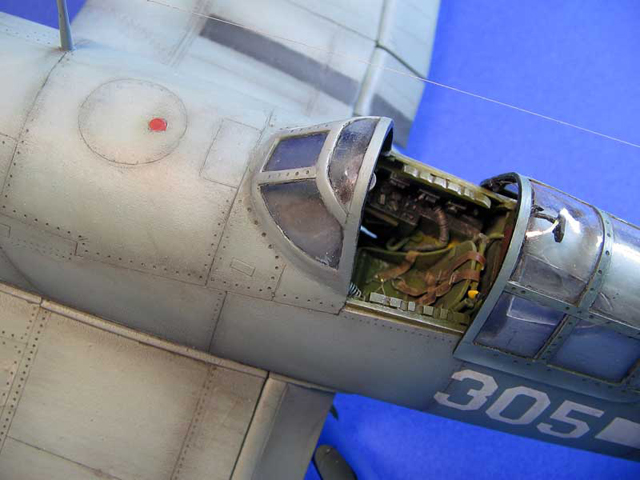
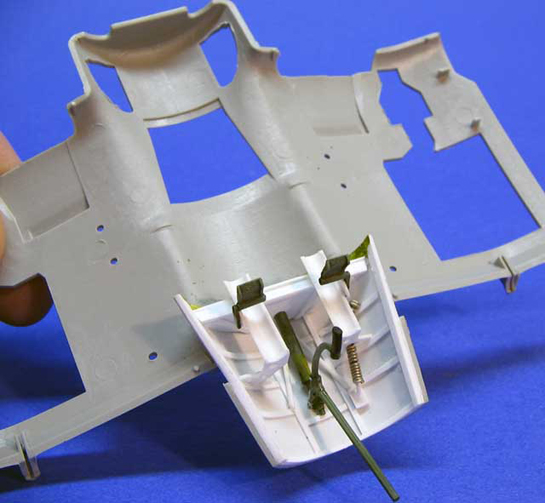
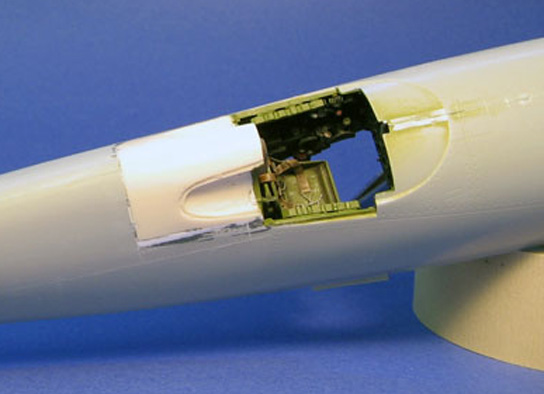
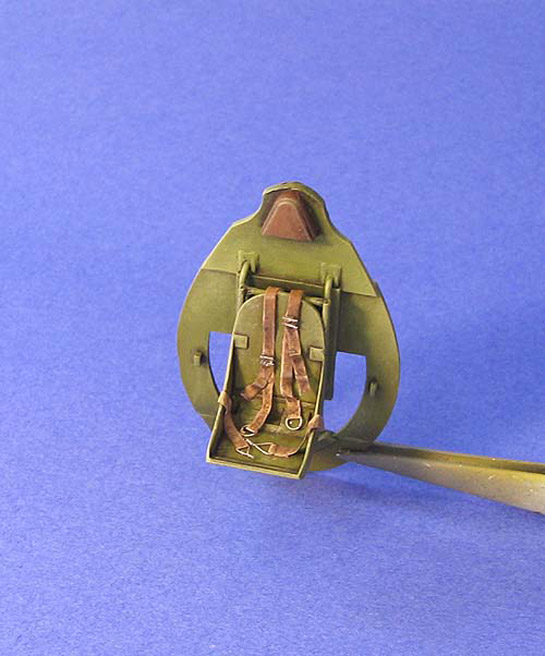
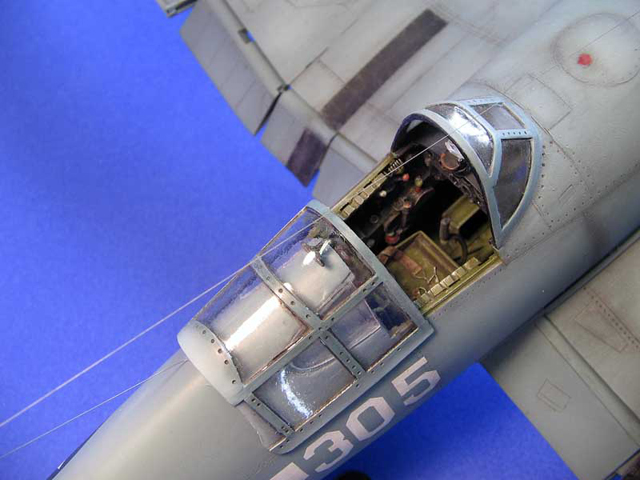
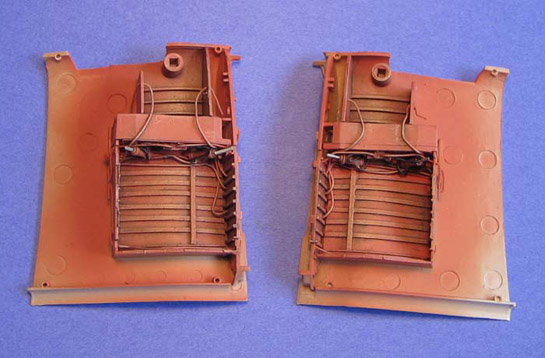
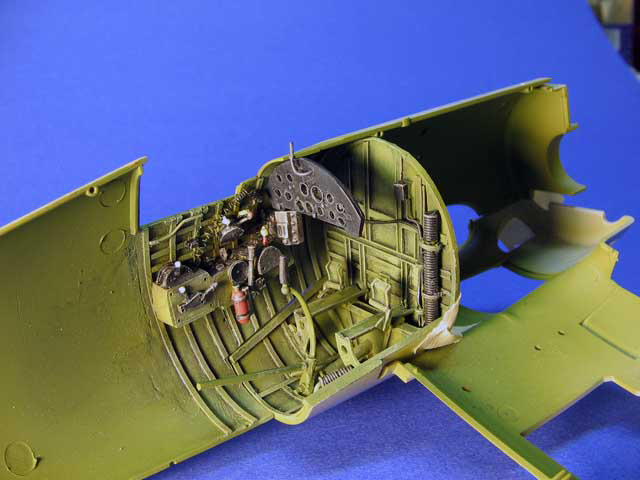
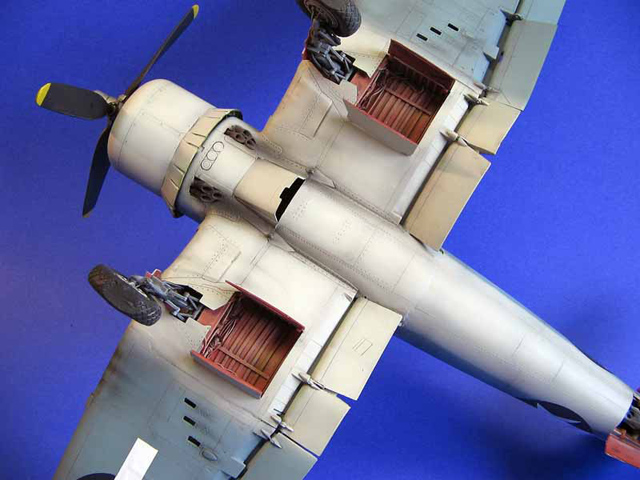
As with most Trumpeter kits the cockpit on the F4U kit is extremely
inaccurate. While the entire late model Corsairs from the -4 model
on had floor boards, the early models such as the -1 to -1D were
floorless. I decided early in the planning not to use one of the
after market resin cockpits. I wanted to do some serious scratch
building in this project, with that in mind I used sheet Evergreen
to build all the components of the cockpit with the exception of the
cockpit seat and control stick.
Click the thumbnails to view larger pictures:
Painting and Markings
Paints used:
Polly Scale USN Blue Gray, USN Light Ghost Gray, Flat Black, Flat
White.
Painting of the Corsair followed my tried and true method; after
all the final assembly was complete I polished all the seams and
exterior areas that required buffing. I then primed the kit with
gray primer tinted with Polly Scale USN blue gray. This allowed me
to see any imperfections in the sanding, after re-sanding and
buffing the areas that required attention I primed again.
I sprayed a base coat of light ghost gray to the bottom; added
black to the base color shadowed the panel lines, added white to the
base coat and highlighted the interior panels.
The top coat
follows the lower painting much in the same way with excessive
shades of highlight color touching up on the shadows as I go along.
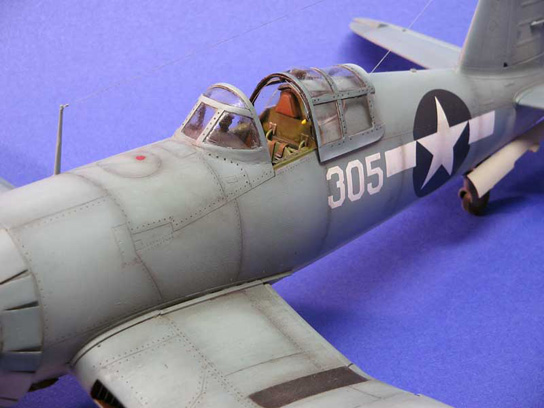
A coat of Future floor wax was applied, and then decals were added
after the paint was dry.
A wash of black and rust enamels followed
the acrylic painting, allowed to dry 24 hours and cleaned in a
shrieking direction of the airflow.
Weathering was applied with pastel oils, and then the entire model
was coated in Polly Scale clear flat.
In all I really enjoyed this conversion I really hope you enjoyed
the article, so run right out there grab an F4U kit, then call Mike
West at Lone Star Models and Go to town on this build.
You’ll
never regret it for a minute.
Thanks and have a great build.