Background
The lines of the OV-10 Bronco have always appealed to me. It is a
rugged looking machine with a real sense of purpose in its unique
design. The choice of kits, though, to build this unique aircraft
are quite limited. In 1/48th scale, the only show in town is still
the Hawk/Italeri/Testors kit. This kit, however, is really
not worth investing the time to make a good model of the OV-10.
The list of problems with this kit starts with no cockpit and goes
downhill from there, including some major proportion errors in the
spacing of the tail booms where the booms are too close to the
fuselage.
Enter Paragon Designs. Paragon Designs
markets an update set for the OV-10A (stock #48090). This set
addresses all the short comings of the Hawk/Italeri/Testors
OV-10 kit and brings it up to being a significantly more accurate
model of the OV-10A. After acquiring the Paragon Designs
update set, I dug out an old OV-10A kit I was squirreling away in
the attic and started working on it.
The Paragon Designs update set is an extensive
re-engineering project for the Hawk/Testors/Italeri OV-10A
kit. The set includes pieces to replace some substantial portions of
the original kit as well as various details to upgrade the
appearance of other portions of the kit.
 |
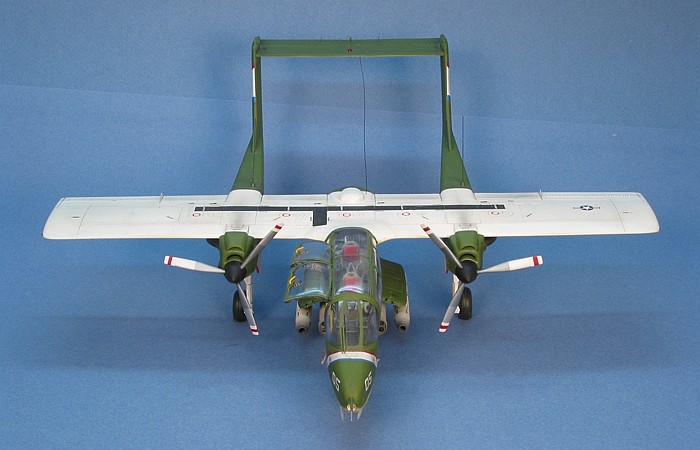
The set includes a complete full
span replacement for the wing and horizontal tail. This new wing
and tail fix the problem with the tail booms being too close to
the fuselage. The wing is also detailed with the correct vortex
generators near the ailerons and proper fairings where the
fuselage and tail booms are attached. |
|
The set includes new rudders for
the vertical tails. These correct the shape and detail of the
trailing portions of the tail booms. |
|
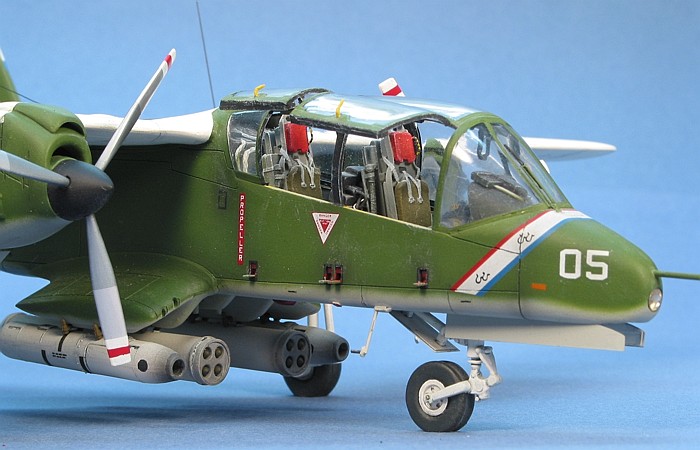
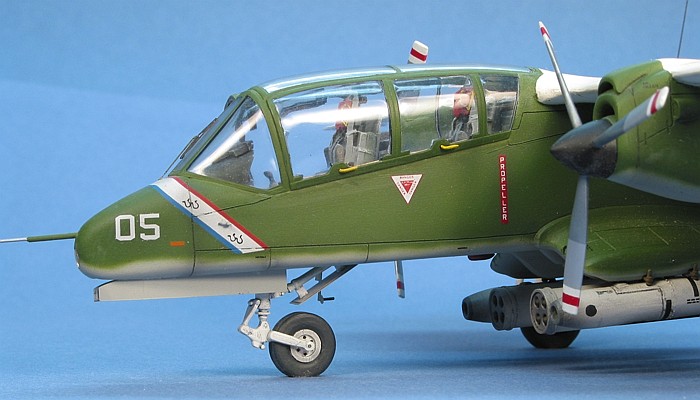
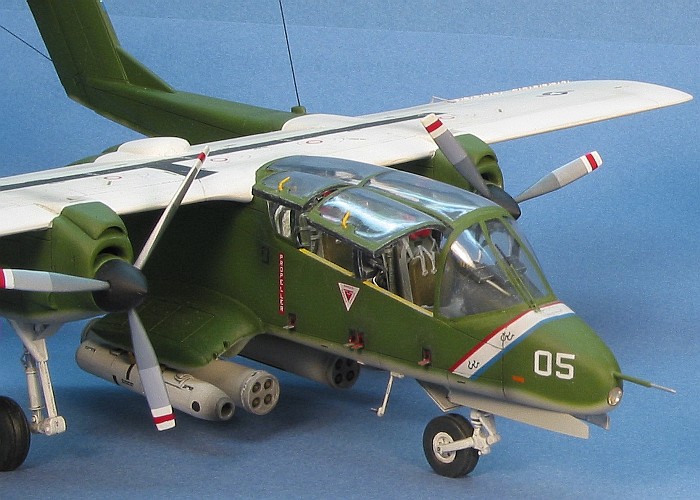
The set includes a simply gorgeous,
one piece cockpit tub, complete with the ejection seats already in
place. To the cockpit tub are added control sticks and fully
detailed main instrument panels with raised detail. All you need
to do is add paint. |
|
The set includes bulged and
flattened tires. |
|
The set includes replacement engine
exhausts. These are hollowed out on the rear side to provide the
proper splitter details inside the exhaust. |
|
Lastly, the set includes an etching
set that replaces the kit provided wheel well doors and provides
some minor cockpit and airframe details. |
In all, only about half of the original OV-10 kit is used to
build the model. Paragon Designs provides the rest. The only
thing not provided by Paragon Designs (that would have been
nice) is the interior of the fuselage behind the cockpit, but that
is not required to build a great model of the OV-10. The best part
of all this is that all the new resin pieces fit with almost no
issues. Only minor filling and sanding is needed (much less than
would have been needed if you built the kit out-of-the-box).
Besides incorporating the Paragon Designs update set into
the kit, I also did a lot of extra detailing of my own.
|
The kit cockpit glass is rather
think and distorts the view of all the details inside the cockpit,
so I cut and opened the cockpit entries to afford a better view of
the interior. Then, I added all the internal latching and bracing
details. |
|
I extended the boarding steps on
the right side of the fuselage. |
|
The Paragon Designs etchings
looked too thin for the wheel well doors, so I laminated sheet
styrene onto them to make them thicker. This also improved their
strength and the strength of their attachment to the airframe.
|
|
I rescribed the fuselage and tail
booms to eliminate the inappropriate rivet details and match the
scribing of the Paragon Designs replacement parts. |
|
I boxed off the wheel wells and
added appropriate plumbing and electrical lines. |
|
I added an M.V. Lens landing
light into the nose. |
|
I added anti-sway braces to all the
weapons stations. |
|
I added and revised various
antennas throughout the airframe. |
|
I added rocket pods (from the
Hasegawa weapons sets) and 7.62mm mini-gun pods (from the
Monogram A-37B kit). |
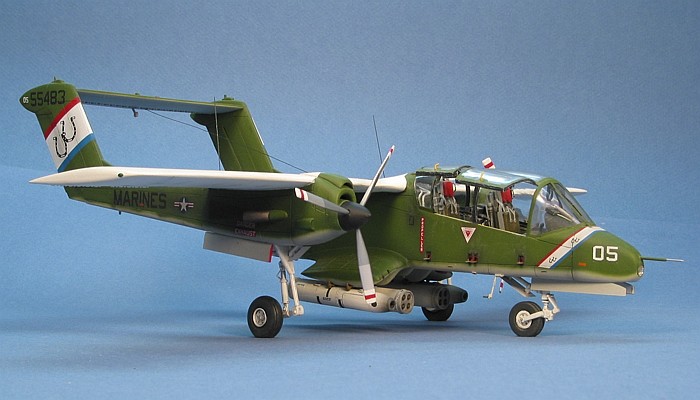
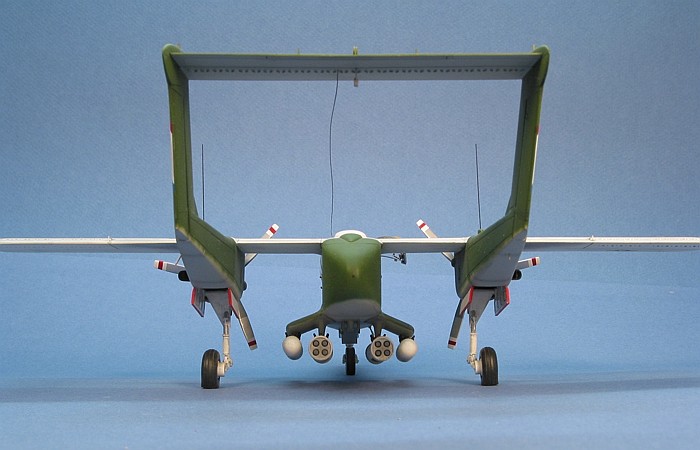
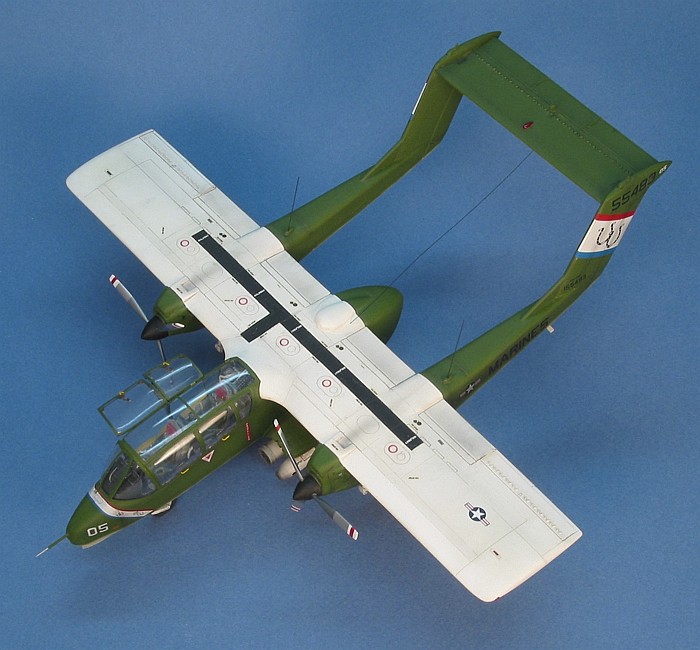
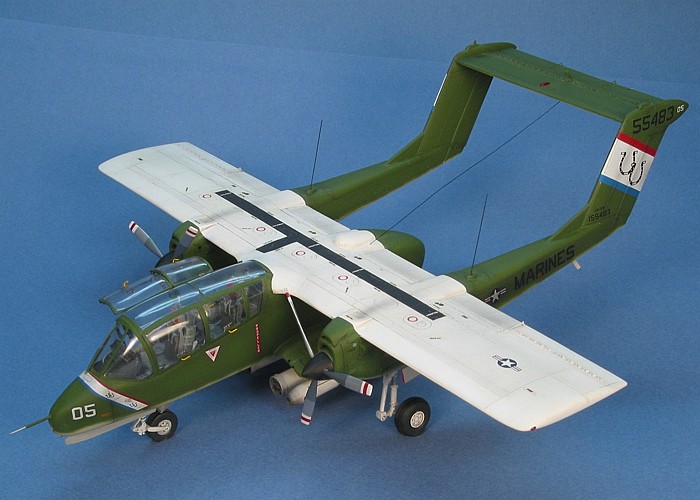
I used all Testors Model Master enamel paints on the model. It is
finished in the standard Marine Green (F.S.34097) over Light Gull
Gray (F.S.36440) with an all white wing.
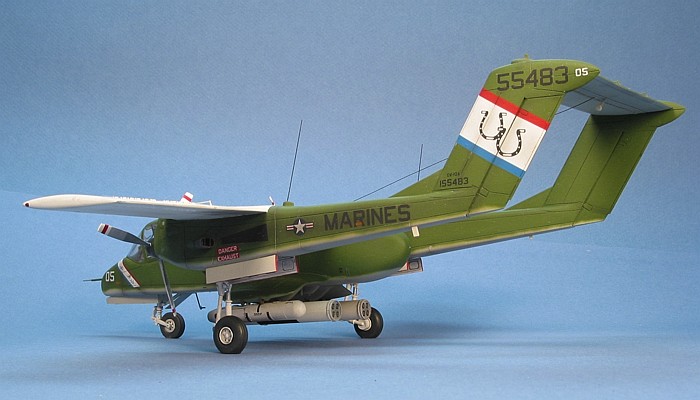
For decals, the markings come from SuperScale decal sheet
#48-365. The model represents an aircraft from VMO-2 based at MCAS
Camp Pendleton in 1975.
Weathering is done with thinned down enamel paint washes and air
brushing to highlight the panel lines and show general wear and tear
on the airframe. A final pass with silver dry-brushing rounds out
the weathering.
Go to Part
Two - OV-10D+ Bronco
|
Click the
thumbnails below to view larger images:
|
|
Project
Statistics |
|
Completion
Date: |
9 November 1996 |
|
Total
Building Time: |
77.0 |
|
Research:
|
1.7 |
|
Construction: |
13.4 |
|
Painting:
|
26.0 |
|
Decals /
Markings : |
7.1 |
|
Extra
Detailing / Conversion: |
28.8 |
|
|
 |
|